Pages

March 29, 2011

Instruments of Atlantis


These four instruments were discovered at the archeological site for Atlantis. Listed are the instruments and what we think they were used for.


I scanned in a sketchbook page and used it as my background layout and then I created a few texture brushes (i.e. watercolor, colored pencil) to give it more of a drawn and painted feel to each image. I used Garamond font for the text.

March 22, 2011

The Crucible Poster


Image to replicate shadow puppet style

March 21, 2011

Shadow Puppetry

Unlike other types of puppets, the shadow puppet itself is never seen in performance, only the effect it creates. The performing shadow puppet is not just a single object of wood or cardboard, but a collection of things working together. However clever or beautiful the puppet shape, it's the puppet's combination with light and a screen that makes its magical effect.

Shadow puppet shapes are made to block some or all of the light and cast a shadow. If you are trying for crisp edges on your shadows, it's important to keep the material thin. Good quality, small scissors give clean edges and the curved scissors make cutting round shapes easy. Remember, it is the edges of the puppet shape the audience notices most, so spend extra time making sure they are clean and even.

Simple puppets use just the main control wire, but more complicated puppets may need a second wire to operate a moving part. For most performances, two wires is about all a puppeteer can handle. While the same type of wire will do for both main wire and second wire, the best second wires are old umbrella wires. These have a tiny eyelet in the end and let you attach the wire to the arm, leg, head, etc. with thread.

Digitally speaking, one is using shadows as the main medium and edge quality. Similar to cut paper, various cutting tools can be used to give different edges, from frayed to clean and crisp.

Richard Bradshaw (http://www.bytypuppets.com/main/page_richard_bradshaw_style_shadow_puppetry.html)

Martha Stewart (http://www.marthastewart.com/article/shadow-puppets)

Wayang Kulit (http://www.edwebproject.org/bali/gallery/puppet.html)

March 16, 2011

Illustrated Me


Me as a cut paper illustration

March 13, 2011

Paper Cutting

Cut paper art is used commonly for scrap booking and construction images. It is great for giving a textured and assembled collage look to a piece. Such techniques are also great for pop-up book art and can incorporate interactive elements either for children or adults. Artists today use this method for landscapes, flowers, and animals. It is usually placed in with the craft category as it is more hands on than other methods.

Important to remember about cutting paper is that it is all about texture and edges.

Paper trimmers are the most efficient in cutting clean and straight lines. They are used most commonly for cards in scrap booking. In recreating this digitally, one can use marquee tools or vector lines to make a refined edge along with various embosses to give a lift to add highlight and shadow.

Scissors will give a slight bend and give to the paper depending on the type, design, and strength of the blades.

Tearing will give a feathered and uneven edge which can be great for more organic creations.

Crumbling will give a wrinkled and organic texture to the paper, that can be a good use for many shadows and highlights along the surface and edge of the paper.

Folding will also give creases and add highlights and shadows to various pieces.

In creating all of these digitally, it is important to use illustrator for edge and line to help with vector lines and patterns that can be transferred to photoshop for texture and painting, etc.


Florindamaria (www.apapercutter.com/papercuttingportfolio.html) uses paper cutting for animals and celebrities, only using one color.

Peter Callesen (www.petercallesen.com) uses paper cutting to creat 3d works of art.

Hina Aoyama (www.designrelated.com/inspiration/view/Karen/entry/2976/paper-cutting-art-by-hina-aoyama) uses paper cutting for fantasy images such as foliage and fairies.

March 09, 2011

The Tree


My lithography piece

February 24, 2011

Lithography Making

The process starts with drawing the image on the stone by using a greasy black lithographic pencil. These usually take three to twelve days, depending on the size and complexity of the image. The main problem is that mistakes cannot be erased. Small corrections can be made with a sharp knife, but major corrections are needed, it is necessary to start again on a new stone. This is important to keep in mind when recreating the process digitally.


The technique of lithography (from the Greek for "stone drawing") relies on "the principle of the antipathy of grease and water." Generally, the stone on which the image is initially created is limestone. The image is drawn on the stone with some greasy material. After the image is drawn, the stone is dampened and ink is applied with a roller. The greasy image repels the water and holds the oily ink while the rest of the stone's surface does the opposite. The stone is chemically treated after the image is created in order to enhance this effect. Some materials for drawing the image are litho crayons and pencils (containing wax, pigment, soap and shellac), liquid tusche (similar in composition to the crayons but water soluble), stick tusche (a solid form), conte crayons, pens and graphite pencils to name a few.

The finished stone is placed on a bed that carries it through the press. The paper is placed on top of the stone with some backing papers to protect it. A sheet of metal or plastic is placed on top of all the materials and they are braced together. A roller underneath that is turned by a handle moves the bed. This is similar to the intaglio press except that a scraper bar instead of a roller applies the pressure from above. The scraper bar slides along the greased metal plate pressing the paper against the stone so that it lifts the ink from where the greasy drawing material holds it on the stone.

Color lithography is a more complex process that usually involves multiple pressings, one for each color in the image. This requires an extensive knowledge of color theory because the process requires the mixing of colors on the final image itself. According to one book on lithography technique, "The original color drawing should be treated as a guide for the final print, not as a finished work to be duplicated exactly." Different stones are sometimes used for each color but the same stone can be used for multiple colors.


Marks are greasy or oily when drawing on the stone, and the use of the threshold effect and layer masks are normally used when making digital lithographs.
Charles Marion Russell (http://www.art.com/gallery/id--a427/charles-marion-russell-posters.htm) used lithography to make images of the West.
Bernard Buffet (http://www.artexpertswebsite.com/pages/artists/buffet.php) used lithography for portraits and animal sketches.

February 19, 2011

Angler: The Fairy Eater


My Impasto piece
Angler: The Fairy Eater. A glowing female fairy tantilizes a male fairy sitting in the grass; unbeknownst to him, the female is a lure attached to a creature hiding in the shadows waiting to pounce its prey.
This piece took approx. 60 layers to paint. The most I've ever had to use.

February 15, 2011

Impasto Thick Painting

Italian for "dough or paste," impasto denotes a painting technique in which undiluted paint is applied thickly like toothpaste onto a canvas so that it stands out from the surface. Color is mixed on the canvas itself to achieve a required color.


Oil is most suited for this method due to its viscosity, slow drying time, and thickness. Impasto offers some advantages, such as the reflection of light in new ways that the artist can control. Also, it can convey feelings and emotions such as in Van Gogh's paintings. Thirdly, it can convey a three dimensional impression, such as wrinkles.
To mimic this process digitally, one needs to be familiar with styles. Using styles to give a lift to the brush will allow for layers to applied to each stroke as if done on a real canvas. Bevel and boss are great tools to encorporate this technique onto the brush stroke itself. One can also underpaint in order to create a more in depth feel to the artwork. To keep away from a mechanical look, apply variety and various stroke directions to give the feel of a real brush.
Willem de Kooning (www.visual-arts-cork.com/famous-artists/de-kooning-willem.html) was an abstract expressionalist who used impasto.
Frank Auerbach (www.visual-arts-cork.com/famous-artists/frank-auerbach.html) was a German impastoist.
Jackson Pollock (www.jacksonpollock.org) was an impasto impressionalist who would abstract in extreme ways.

February 09, 2011

Turelyn: The Giraffe


Scumble and dry brush technique to create a giraffe centaur in Africa

February 02, 2011

Dry Brush and Scumbling

Scumbling is the application of a fine layer of paint with a very dry brush. Rather than the pigments being dispersed in a transparent medium, it creates a fine mesh of opaque pigment. This method is usually used when painting scenes of nature, water, atmospheric effects, or different types of lighting. Opaque colors are placed over in thin layers over darker colors to create a softening effect.


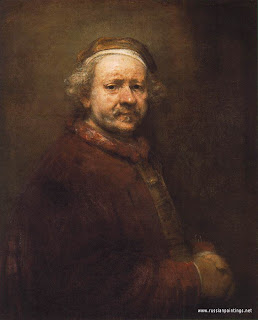
This technique has been in existence since the 1600s, Rembrandt being the most famous user. This method is effective in building depth adding layers and textures.

Scumbling is similar to glazing, except that the coat is opaque, and is painted very thinly to allow bits of paint to shine through.

To recreate this effect digitally, one needs a textured surface and natural brush tools. Using multiply and subtract brush techniques, one can scumble on photoshop. The lines, being almost scratchy and fading, give the illusion of a natural painting. Textures can be of great help to give off a realistic feel and assist with a brush stroke looking effect. Blend using the texture and play with the opacity level to give an extra touch of authenticity. Light strokes on dark texture background help with highlights and gives a three-dimensional look to form.

Rembrandt (www.rembrandtpainting.net/famous_works.html) is one of the most famous painters to encorporate this technique in his most well known and realistic works. He is known as the master of light, and scumbling helped him get there.

Francis Bacon (www.nytimes.com/2009/05/22/arts/design/22baco.html) uses scumbling for abstract images.

Diego Velazquez (www.ibiblio.org/wm/paint/auth/velazquez/) was a 17th Century Spanish painter who encorporated scumbling similar to Rembrandt.

For a detailed description on how this can be accomplished on photoshop, go to (www.joshruff.com/dptutorial/index.html)

January 29, 2011

Gadget, P.I. (Noir)


Noir Comic Version of Inspector Gadget using halftone dot silkscreen

January 26, 2011

Silk Screening

Silk screening is one of the most versatile of painting methods. It can be used on fabric, metals, glass, cardboard, and paper. Silk, organdy, polyester, or another mesh is stapled to the bottom of a frame while sealing tape covers the staples and extends past the frame onto the silk. A stensil is attached to the underside of the screen and the material to be printed is placed on the table with the screen over it. A generous amount of ink is put on the top of the pattern. A squeegee is rolled across the pattern, pulling the ink along with it, forcing it through the silk and onto the material being printed. Each color added must thouroughly dry before another can be applied.


Silk screening began in ancient China when printing designs onto their clothing. Then the process became patoned by Samuel Simon in 1907 England as a process to make decorative wall paper. Andy Warhol made the process popular in modern times with his image of Marilyn Monroe. Today, it is used for printing onto T-shirts.

Andy Warhol: www.warhol.org/collection/art/ being the most famous, is an excellent example in good silkscreen prints. His use of color and content speak for themselves as his work gave new life to this method in art.

Doug West: www.dougwestart.com/gallery/galleryLE.html uses landscapes to show his work in silkscreening. His blend of colors and print combinations make for a beautiful piece of nature.

Lawrence Rugolo: http://web.missouri.edu/~rugolol/ has been making prints since the 1960s. His blend of line work and print show adapts with the times. His figures mixed with landscape are also well done.

January 25, 2011

Mary Shelley's Frankenstein


Relief Print of Frankenstein book cover

January 22, 2011

Relief Printing Process

Relief printing is one of the oldest forms of print making, the most common of which is woodcut. By cutting away uninked lines and shapes into the wood block, one leaves a raised image that will be used for printing an image. The raised surface is inked and pressed either by hand or another method onto a surface.


It was originally used for printing text in the fourteenth century, but a handful of German painters in the early 1900s revolutionized the process into its modern method.


Tools used in relief print: block surface for carving (wood, linoleum, plastic sheet, poly tiles, potato prints, etc.), cutting tools, ink, rice paper, and something to press (can be hand).

Prepare a drawing the same size of the wood block. Lay onion skin paper on the drawing and trace the outline of the drawing with pencil, keeping the stack undisturbed throughout. Turn the onion skin paper over and tape it to the block. Slide a carbon paper underneath and trace the pencil lines from the back of onion skin paper to transfer the design to the block. Because the carbon color is not reliable, fix the design with ink. Tint entire block with an oil color, which helps to tell the working of cutting tools when wood is cut away.

Start cutting from main images. The cut areas must be clean enough, for burrs catch unwanted ink. Woodcut produces images by scooping sections of wood off bit by bit. How the subtraction is performed is what woodcut technique based upon. More wood around the figure being removed by gouges to free the figure from the ground. At the finish give the block a light coat of ink for a preview. If adjustment is needed, wipe the block clean with a strip of soft rice paper before continue. Be aware that any cutting mark is a final decision.

When duplicating this process digitally, the key thing to remember is brush type and size. The eraser tool acts like a carving tool to erase away what will not be printed. Various widths and lenths and types of tips will help determine which should be used for various line qualities and results.

January 18, 2011

2D Cell Animations

Animators begin by drawing sequences of animations on sheets of paper perforated to fit peg bars in their desks, one picture or "frame" at a time. The animator draws enough of the frames to get across the major points of action. While working on a scene, a key animator will usually prepare a pencil test, a preliminary version of the final animated scene; the pencil drawings are scanned or photographed and synced with necessary soundtracks.

While the animation is being done, background artists will paint the sets over which the action takes place. These backgrounds can be painted in acrylic, guache, oil, or even crayon.

Once clean-ups and in-between drawings are completed, each drawing is then transferred from paper to a thin, clear sheet of plastic called a cell, so called because they were made from cellulose nitrate. The outline drawing would be inked and the reverse side would be painted for proper color, highlights and shadows. The transparent quality of the cell allows for the background or other objects to be seen behind.

When an entire sequence has been transferred to cells, each is taken and laid on top of each other with the background at the bottom of the stack. A sheet of glass is then placed on top to flatten the image and the whole stack is photographed. The cells are removed and new ones are placed in and the process begins again. Each photograph represents one frame of film.

January 17, 2011

Orzo: The Necromancer


(First) Model reference


(Second) Finished line drawing


(Third) Final 2D Cell Animation, Character Inked

January 10, 2011

Technical Skulls


My Technical Illustration of Skull